How to Scan Old Slides Without Losing Detail
- Sabe Ellis
- Aug 13
- 6 min read

A box of color slides can hold decades of family history: a first home, a school play, a fishing trip, or relatives whose voices are no longer familiar. Learning how to scan old slides gives those images a future, but the process deserves care. A rushed scan can preserve the picture while losing the detail, color, and context that make it worth keeping.
Slides are small pieces of film, usually mounted in cardboard or plastic frames. They often look brighter and more detailed than prints because they were designed to be projected. That also means a phone photo of the slide or a quick scan on a basic office scanner may not capture what is really there. The right method depends on the number of slides, their condition, and what you plan to do with the finished images.
Start by Sorting and Inspecting Your Slides
Before scanning, work through the collection in a clean, dry area away from food, drinks, pets, and direct sunlight. Handle slides by the mount edges whenever possible. Fingerprints on the film surface can be difficult to remove and may show clearly in a high-resolution scan.
Sort slides into small groups by event, year, family branch, or whatever organization makes sense to you. If a slide box has handwritten labels, photograph the label before moving anything. Those notes can be just as valuable as the image itself, especially when no one remembers where or when the picture was taken.
As you sort, look for common condition issues. Dust is normal. Faded color, scratches, bent mounts, mildew, and warped film require more caution. If slides have a strong musty smell, visible mold, or sticky surfaces, separate them from the rest of the collection. Do not run damaged slides through an automatic feeder, since the slide can jam or shed debris inside the equipment.
Choose the Best Way to Scan Old Slides
There are three practical approaches: a dedicated slide scanner, a flatbed scanner with a transparency adapter, or a camera-based setup. Professional transfer is another good option when the collection is large, delicate, or especially meaningful.
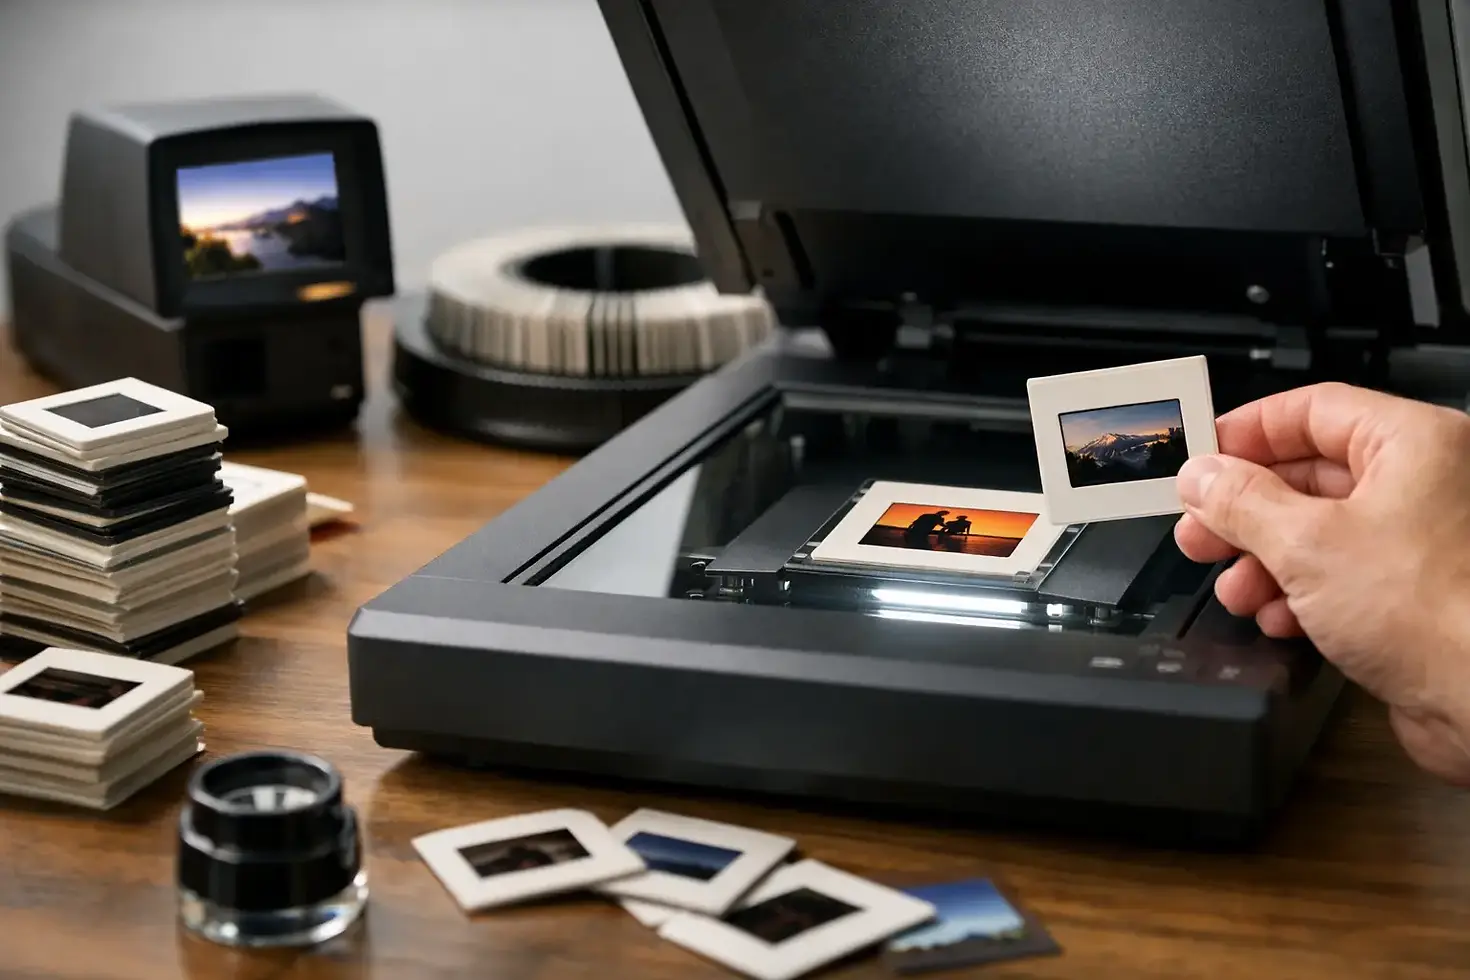
A dedicated slide scanner is usually the best home choice for 35mm mounted slides. It shines light through the film rather than reflecting light off the surface, which is necessary for a proper result. These scanners can produce detailed files and may include infrared dust and scratch correction for compatible color film. The trade-off is speed. High-quality scans can take several minutes per slide.
A flatbed scanner with a transparency unit can work well for occasional scanning and larger film formats. It is convenient if you already own one, but many consumer flatbeds do not pull as much detail from a 35mm slide as a dedicated film scanner. For images that will only be shared by email or viewed on a phone, that difference may not matter. For enlargements, photo books, or archival use, it often does.
A digital camera or smartphone setup can be fast, especially when paired with a slide-copying attachment and a consistent backlight. This method takes practice. Even lighting, accurate focus, camera alignment, and color correction all affect the result. It can be useful for large collections, but it is not always the easiest choice for someone who wants dependable quality without a technical learning curve.
For slides with damage, unusual formats, or irreplaceable family value, a professional transfer service can be the safer route. Proper equipment, careful handling, and image correction can make a noticeable difference, particularly with faded Kodachrome or older color film.
Clean Carefully Before You Scan
Dust is one of the biggest reasons scanned slides look disappointing. Start with a hand-held air blower made for camera lenses or film. A few gentle puffs can remove loose particles without touching the film. Avoid canned air, which can spray propellant, and avoid household cleaners, paper towels, or rough cloths.
If a slide needs more cleaning, use a clean microfiber cloth or an anti-static film brush with a very light touch. Do not scrub. A scratch on the film cannot be scanned away, although some software can reduce its appearance later.
Do not try to flatten severely warped slides by forcing them into a holder. If the mount is bent but the film appears stable, it may be possible to replace the mount. If the film itself is curled, cracked, or separating, set it aside for professional evaluation. Preservation comes before speed.
Set Resolution for How You Will Use the Images
Resolution determines how much detail the scanner records. Higher numbers create larger files and longer scan times, so there is no single setting that fits every project.
For 35mm slides, 3,200 to 4,000 dpi is a sensible range for most family archives. It provides enough information for quality digital viewing, photo books, and moderate enlargements. If you expect to make large prints or crop tightly into an image, choose the higher end of that range. Scanning at 1,200 or 1,800 dpi may be adequate for casual online sharing, but it can limit future options.
Save a master copy as TIFF when possible. TIFF files are large, but they retain image information without the compression used by JPEG. You can then create JPEG copies for texting, social media, email, or easy viewing. If storage space is limited, high-quality JPEG files are still far better than leaving the images trapped on aging film.
Use 24-bit color at minimum. Avoid aggressive automatic adjustments on the first scan if your software allows it. Automatic contrast and color settings can help some slides but can also remove shadow detail or make skin tones look unnatural. Scan a few representative images first and compare the results before committing to a large batch.
Scan in Small Batches and Check Your Work
Place each slide in the holder according to your scanner's instructions. Keep the orientation consistent so the images do not need to be rotated one by one later. A simple system helps: scan everything in a box from left to right, then label files using a date or box number, such as “SmithFamilyBox1001.”
After the first batch, view the files at full size on a computer screen. Check focus, dust, cropping, brightness, and color. Look closely at faces, signs, clothing patterns, and other fine details. If the scan is soft or the shadows are blocked, correct the settings before continuing.
This quality check may feel slow, but it saves time. Re-scanning 10 test slides is easy. Re-scanning 500 slides after the originals have been put away is frustrating and can add unnecessary handling.
Restore Color Without Changing the Memory
Many older slides develop a color cast over time. Reds may fade, blues can become heavy, or the whole image may take on a yellow or magenta tone. Basic editing software can often improve color balance, exposure, and contrast.
Make edits on a copy, not your master file. Start gently. Adjust the white balance, then brightness and contrast. Bring back detail in dark areas before increasing saturation. It is tempting to make every slide look vivid and modern, but overly strong editing can make a 1960s living room or a child's skin tone look artificial.
Some imperfections are part of the original record. A little film grain is normal. Light scratches may be worth keeping if removing them creates smudged details. The goal is a clear, faithful image, not a version of the past that never existed.
Organize and Back Up Your Digital Slide Collection
Once scanning is finished, add basic information while the details are still fresh. Include names, locations, approximate dates, and events in file names, folders, or photo metadata. Even a note such as “Grandma's garden, around 1974” makes the collection far more useful for the next generation.
Keep at least three copies of the finished files: one on your primary computer or external drive, one on a separate backup drive, and one stored away from your home. A cloud backup can be useful, but it should not be the only copy. Hard drives can fail, accounts can be lost, and family collections deserve more than one place to live.
Store the original slides in acid-free boxes in a cool, dry interior area. Avoid attics, garages, basements, and locations with frequent temperature swings. Digitizing does not make the originals less important. It gives you a working copy while protecting the physical collection from everyday handling.
When It Makes Sense to Use a Professional Service
Home scanning is rewarding when you have time, a manageable number of slides, and equipment that can meet your needs. It may not be the best fit when you have thousands of slides, limited time, fragile originals, or a deadline for a memorial, anniversary, reunion, or business project.
A professional service can scan, organize, and deliver images in a format that works for sharing, printing, presentations, or video montages. At Digital Transfer Service of West Virginia, careful handling and practical guidance help families and organizations move older media into usable digital formats without turning the project into a technical burden.
The best first step is often the simplest: choose one small box, scan a handful of slides, and see what appears on the screen. Those images have been waiting quietly for years. With a careful process, they can become part of family conversations again instead of remaining hidden in storage.
Comments